Archive
Mini Book
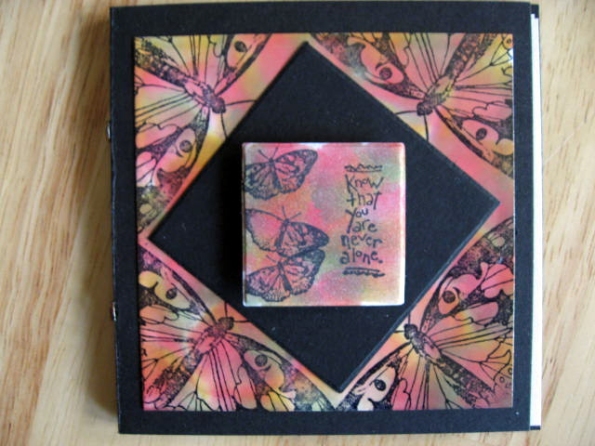
Above shows a mini-book that we did at our “Design and Treasure” class on Friday night. It was alot of fun! It only measures around 4″x4″. We used cardstock for the cover, and a few pages cut from copy paper. For the cover, just fold the cardstock in half, then fold about 1/4″ back from first fold. (Fold again. ) We took a piece of white cardstock, and colored with a few colors of alcohol ink, using a felt pad stamp. We squirted the blending solution over the cardstock before stamping. We started this layer with a silver metallic pen, just dotted over the surface. After applying the alcohol ink, we stamped butterflies in black.
Layer a small piece of black cardstock over this layer, and use same alcohol technique for small top layer. There were two stamps used on the top layer. Small butterfly was stamped at random.

Brads were used for the binding. We colored the brad tops with alcohol ink.

Another “Pop-ups by plane class” card

This just shows a couple different views of the same card. We did this, at our “Design and Treasure” class, on Friday night. It was already precut, we just did the folding. They do sell the templates, and accessories, to make these cards. I already have some at home, and cannot get them to cut right, the lady suggested that I may not be holding the blade correctly, or something. I don’t know, but I sure do want to go to their website to watch the video! It would be worth it, if I could get it figured out, I do like the end result of these templates.
Holographic sticker card

This card is basically all done with stickers, on glossy black cardstock. They were selling these at the “POP-UPs by Plane Class” booth. Their website is www.popuptemplates.com They said they have video tutorials at their website, on how to use their templates, and stickers. How nice!
Coloring with Crayons
(Note the tablecloth is blue checkerboard, it is not part of the project!)

This was an interesting project! We made this, at the “Design and Treasure” class, on Friday night. It was actually kind of fun. We got a small piece of illustration board that had the prestamped image already on it. (Stamped in black ink.) Then we took crayons, and colored in the image, at random. Then we took a black ink pad, and spread ink all across the image. After wiping off the ink, we took a pair of scissors, and scratched out designs, like a scratchboard project. Then most people let the lady doing the demo have them, as she promised to clearcoat them with her special glaze.
I was the only one that did not have her take it, to finish. Everyone else’s designs looked so pretty, and mine looked so dark. Guess I didn’t press hard enough with the crayon, for a good resist. So I took mine home, and lightly sanded it, and it helped some. I had some clear crystal laquer that I coated mine with. It turned out better than it started, but I still think it’s too dark. I may try this project on my own, and color harder with the crayons next time! The company for this one was “Stamp Zia”.
Black and Silver Christmas card

This was a card that we made, at our “Design and Treasure” class, on Friday night. We started out with silver cardstock, and used a “Corner Adorner” punch, to punch the edges out. We used a tiny snowflake, and a checkerboard stencil, to stamp the image in random formation, in silver ink, for the front background.
Note that all pieces are precut, except for the circle on the front. After stamping the saying in silver ink, we used a humongous circle punch, to cut the layer. Then we used a separate small ornament stamp, to go in the center. Was very easy to line up. We put the black background in the holes punched in the corners, and glued the rest of the embellishments to the card. The circle on the front is adhered with a pop dot.

This shows the inside of the card. We used a separate piece of thin black paper, about the thickness of computer paper, and used a 3D punch, for the center hearts, you had to punch this with the paper folded in half. When you make a few creases, you can pop it out, like shown in the pic below. With a few stamps, and some adhesive, the card was fun and easy to make!

The company for this card is “Endless Creations”. Their website is www.shopec.com, and I think the lady said they were updating their website, so if it looks funny, just keep checking back. This is where to go, if you want a 3D punch. They aren’t out on the market right now, I guess, for some reason.
Merry Christmas card
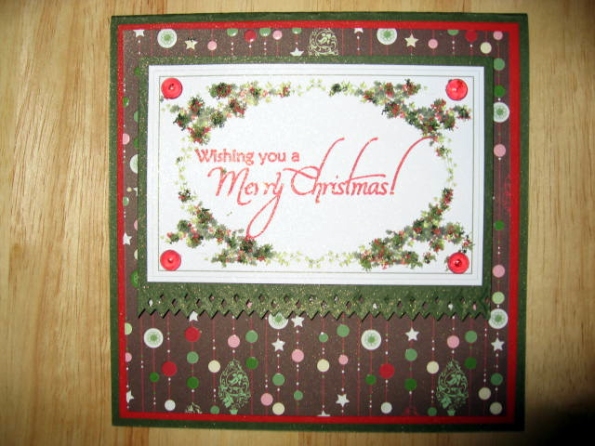
This is a card that we did at convention, at a make and take table. They were demonstrating this at the booth for “Our Daily Bread Designs”. They had some wonderful stamp sets for sale, and many other items. Their website is www.ourdailybreaddesigns.com. All the paper was precut. We just had to fold the card in half, and used the “Glue Glider Pro”, to adhere together. We used a Martha Stewart punch, for the decorative edging, and picked out our stamp image from a few they had to choose from. We could choose either red or green ink, and either red, or green dewdrops. We put these on, with the flat glue dots. I believe it was a “Flowersoft” design that we used for the front saying, we embellished it with flowersoft.
You may be able to tell that we used a popdot to adhere the front to the card. I do like this card, it turned out very nice, even though I messed up, on the punch. I almost forgot that we finished off the front with Tattered Angels glimmer mist, in gold. (Just on the stamped white piece.)
Rubber Stamp Convention 2009
This past weekend was such a blast! My friend and I look forward to the local rubber stamp convention, every year. We have been there faithfully every year since it started, about 10-15 years ago. It is so much fun, there are many vendors with products for sale, and most of them either do demo’s, or make and takes. (I will show our make and takes, in another post.) I have pictures in this post, of the things I brought home.
This convention has been through about 3 or 4 different companies since it started, and has been held in the “war memorial coliseum”, most of the time. And more often than not, they have had a “stamp party”, with make and takes, most of those years. It is usually either on Friday, or Saturday night. We went to the one this year, held on Friday night, it was called “Design and Treasure”, and we all made 4 projects. I will do a separate post for these projects, as well.

These first 2 pictures show everything grouped together. Following is all of the individual items.
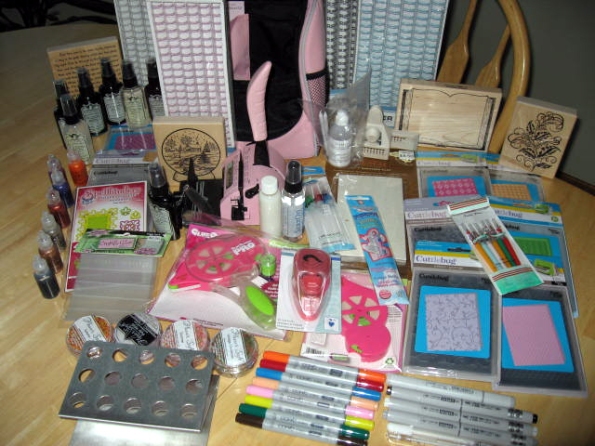


I have been dying to try out the Copic markers, and finally got my chance. My friend and I both got some! I did find out that you cannot use the airbrush with the Ciao ones, but they were so inexpensive at the Marcos booth, that we couldn’t resist. I guess they all color the same, anyway, and I know I will get more to add to the collection.

Copic blender, Triart markers, and white gel pens! The Triart markers are alcohol based, like the Copics, but they have 3 different tips, and are only $3.99 apiece. The lady at the booth showed us a comparison between the two, and you could not tell the difference.

Here are some pictures of my new stainless steel Copic holder. When I get too many to fit in here, I will use it for my most used items on the craft table.


We were also tickled pink, to finally get to try out “Flowersoft”. I recommend it, if you are on the fence. So easy to use, and it really gives your projects some added bling. My only regret is not getting a jar of the Christmas Green, for my card trees.

This is the “Gary Burlin” brand of Stickles. They have a little bit of everything in their booth, and always have discounted items in big totes. These little bottles were only $1.25 apiece. I tried to get all of the colors they had.

The next four stamps are the only ones I bought. (I already have hundreds!) They are by “Heartfelt Creations”, located in Nappannee, Indiana. I thought they would make wonderful Christmas cards.


The last three stamps on here, are combined into a card sample my friend got a picture of, as we both bought the stamps to make it. I will include the picture of the sample card below, so you can see what it looks like.

I also want to go to Hobby Lobby, and find a Linus (Peanuts by Charles Shultz,) stamp, to use with the one above. (My friend confirmed that it was what he says, in the Christmas special.)

Above is the picture that shows the card, that we bought the stamps, to make.

Another sample, using the stamps!

BIA wires in white, pink, blue, and (plain).

We got to try out the “Glue Glider Pro”, as well. We loved it, and had to buy. I get tired of buying adhesive so often, and hope this one lasts much longer than the little ones do. With the refill, I think it will be a great money saver.

We used these flat glue dots, with the dew drops on a sample card. They were inexpensive, and I needed these. The only ones I have right now are the “Zots”, and they are big and fat. You can’t use them for everything you need to. My friend said she had some flat ones already, in a different brand, and I remembered I did too, but haven’t been able to find them in years. I really have looked for them alot, but never did find, I think they are lost forever, so for two bucks, I got these to replace them.

I got this “Shapabilities” die, to make 3-D snowflakes. The demonstrator had a snowflake, and a pumpkin, using the “Renaissance Hearts” die. I will post pictures of these, so you can see what I’m talking about.


Three pictures above shows how to use the Shapeabilities dies, to make snowflakes, and pumpkins. I need to get the one to make the pumpkins, I love it!

The heart punch is a “3-D” punch, I’ve never seen before the stamp party. We used this punch, to make pop-up hearts, in the center of the card. (You will see this, when I post the projects we made.)
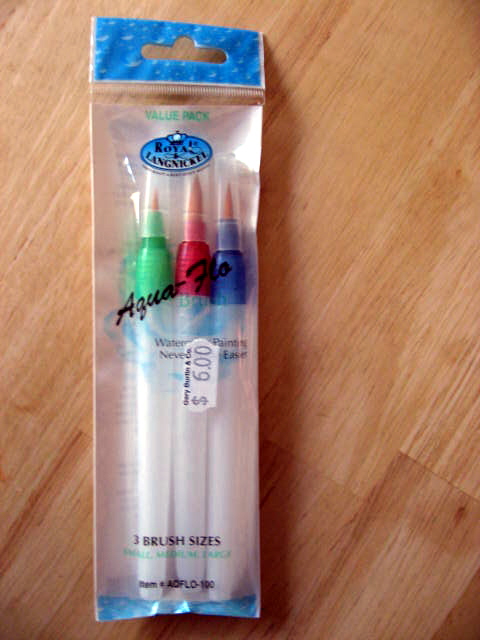
I love waterbrushes for “Twinkling H2o’s”, and other things. But mine were getting pretty ratty, and needed to be replaced.

Was also searching for better quality brushes to use, in my stamping projects. I think these will work well.

Seen these before, but never knew quite what they were. It’s a glue pen, with a very fine tip. It writes just like a ballpoint pen, only it’s filled with glue! Got to try them out at a make and take, in our LSS, convention weekend. Just what you need to apply glitter in a small line, or area. One lady said they always write smooth, and don’t get clogged.

Gamsol is something I had heard of before, when watching a Prismacolor video, showing how to blend the Prismacolor pencils. The artist said you could also use alcohol and a Q-tip, but I found that the Gamsol with a blending stump lets you get into small areas very well. (Also tried at the make and take, at LSS.) So even though I wasn’t going to buy this, since learning you could use alcohol, I knew this technique was easy, and worked well, for what I wanted to do.

Been wanting this punch, since I don’t have a picket fence image, on any of my current Cricut cartridges. (I don’t yet have either SCAL, or DS.) I think it will be great for my cards.

The Tattered Angels embossed tiles was used in one of our make and takes. The demonstrator cut a piece in half, for our project. I wanted to get some, so I could make more, as it was a very fun project.

I needed this, as one of my stamps is still black with “Stazon” ink. Thought I already had some, but cannot find it, if I do. Been holding off on using Stazon, until I got this.

This bad picture, is a bottle of “Stamp Zia” brand clear laquer coating. It looks like milk, and is supposed to be non-smearing, if you use it over ink. We used it, on a make and take project.

Tattered Angels Glimmer Mist. I’ve been hearing about this stuff all over the place. Never tried it, until now. We used it on the Tattered Angels tiles, and I went back 3 times, and kept getting more colors. I like using the color sprays on my projects. I have some currently, but they are Walnut inks, and come out very dark. I wanted to get some that were brighter, and these are perfect.
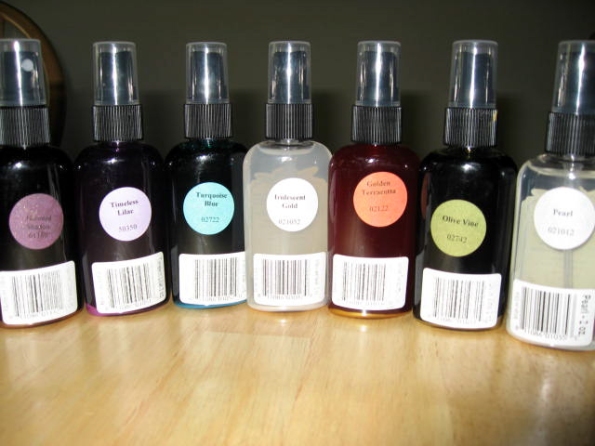
I tried to get the back of the Glimmer Mist, so you could see the colors. The one on the very left is hard to read, and it is “Haunted Shadow”.

I love the Cuttlebug folders, and only have two. Since they are so inexpensive now, I bought eight, at convention. Individual shots of them are below.

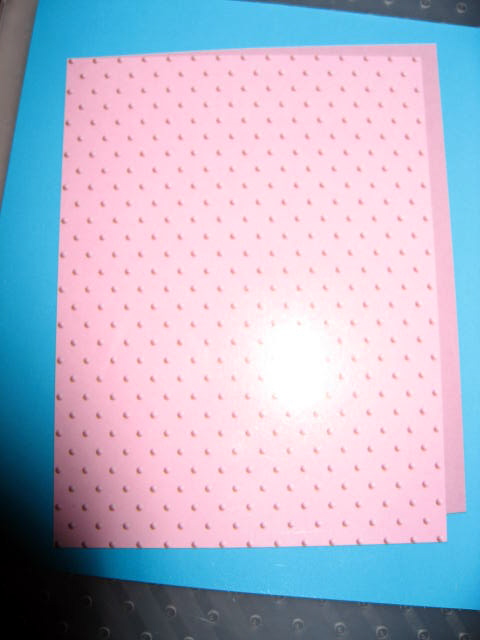


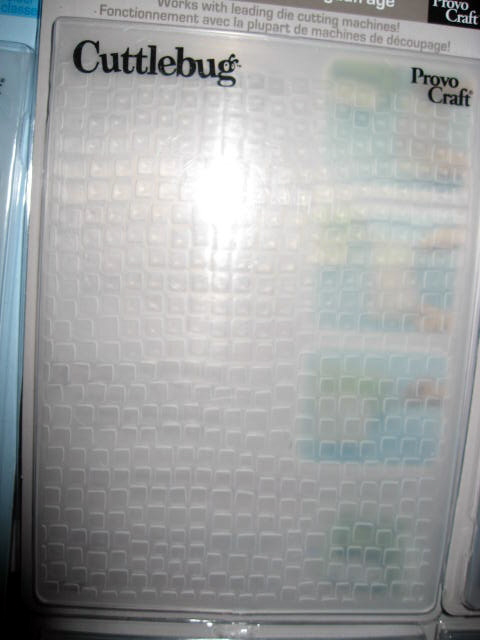


This was what I was most excited to go to convention to get, a Bind-it-all machine! Been wanting one for awhile, and picked up the bag, too. I love making little books, and journals. I need to watch the DVD, before I use it, because I have no idea how it works completely. I got the machine, wires, and bag, all half off, since I got the Marco’s email. What a deal!

Halloween Harry
Here’s the guy that takes care of salesmen at our house! Lol, just kidding, maybe? I haven’t heard the doorbell, since he’s been guarding the place! He’s been at our house for about two weeks now, but I just got the pic onto my computer, so here’s the info:

I used a pair of my husband’s old coveralls, and boots. We already had the Halloween mask. The wig and hat are all built into it. The ends of the limbs are secured with zip ties, then trimmed close. I used long balloons for the arms and legs. Tied two together for one limb, so they are all jointed. I also used newspaper and Walmart bags to fill in spots. One round balloon went into the back of the mask, and box tape holds it together. Cardboard torn from a box taped to back of balloon, keeps his head from rolling, in the high winds.

Hopefully I will soon have more Halloween home decor projects to post, I am planning to carve a pumpkin, and working on a Halloween village to decorate the mantle, with garland to match!
More Winter Woodland Skater Cards
Here are the pictures of what I have been working on tonight. The bottom two cards I did a couple days ago. All of the skater girls were colored with pastel pencils, and the accents were made with a black, fine tip Micron pen, and red Stampin’ Up marker. Bottom of skates were done with a silver Krylon leafing pen.

Keep in mind the blue checkerboard is my tablecloth, not a part of the card! I didn’t realize when I took these photos, how much it looks a part of it. On this first one, I used the “Winter Woodland” Cricut cartridge, to cut out the skater, snowflakes, word “Joy”, and the background layering piece. I used a cuttlebug embossing folder, to emboss the silver cardstock in the background, and applied “Diamond Dust”, around the perimeter of the piece. I used pop dots to apply the snowflakes, so they wouldn’t get in the way of the diamond dust, I already had this on there, and they would have been hard to glue down. I used white stickles to adhere the blue pebbles in the center of the snowflakes. I edged the front of the card with a Krylon silver leafing pen. (I love those things, they are really wonderful, I have gold, silver and either bronze or copper too.) The shadow for the word “Joy” is done in a dark green, for some reason it looks black on this screen.

The card above is certainly not my favorite one. Sometimes my cards are a little “out there”, and this one is no exception. I never know quite how they are going to turn out, and when it needs a little something, sometimes what I try doesn’t always work. Sometimes it does, and I’m not so sure about this one. I used the “Winter Woodland”, to cut out the skater, the cardinal, and the silver background. I ran the background through a cuttlebug folder to emboss. Went around the edges with a Versamark pen, to apply embossing powder called, “Cow of many Colors”. It’s a white pearlescent powder, and got it’s name because the company that sells it is, “Cowtown Stamps”. They have been coming to our local convention ever since it started. I used a red Stampin’ Up marker to make tiny stitch lines around the background, but I got too close to the edge, and the lines are too small, it’s hard to see. I used clear Crystal Laquer to apply the blue pebbles at each corner. I used a red, and a green Stampin Up’ marker to doodle around the outside of the card. I applied green Stickles as dots, at random throughout the doodles. I attached the cardinal with a small handmade spring, with half a Zot at each end. Unfortunately, my spring does not work like a spring, like I thought it would. I may take it out.

The card above is not my favorite, either. Cut the skater and the background with “Winter Woodland” cartridge. Embossed the background with a cuttlebug folder. I don’t know if it was the paper, or my machine. (I don’t have a Cuttlebug, I use a “Wizard”, die cut and embossing machine. I just love it, you can use your brass stencils just like embossing folders!) Was having trouble with my cardstock, it kept cracking with this particular embossing folder. The cardstock is DCWV metallic textured, and did not like this folder, for some reason. So I found a spray bottle with water in it, I had been using for plants. I sprayed the back of the cardstock before running it through, and spread the water around with my finger, until it got soft and started to curl. Ran through the embossing, and worked like a charm! Of course it curled, as it dried, but I was going to glue flat to my card, as a background anyway, so it did not matter.
Tied some ribbon around the edge, and glued to the back so it would not move around. I used Diamond Dust to frame the skater, and it did not turn out as well as I thought it would. Not going to do that again! It’s hard to see on the metallic cardstock, but I used a classic brown SU ink pad to distress the edges a bit. Used a couple of corner punches, and punched out a scrap of silver, to put in the center. I used the same scrapbook paper as I did for her dress, to line the inside of the card, white side out.

Skater, snowflakes, “Joy”, and background piece were all cut using “Winter Woodland”. Cuttlebug embossing folder for the silver background piece. Used Stickles to adhere the blue pebbles, on the snowflakes. Gold edging was done with Krylon gold leafing pen.
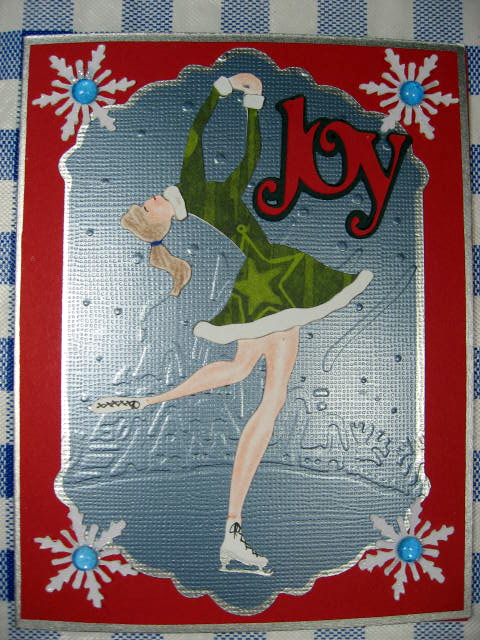
Above card is a duplicate of instructions for last card, except the colors are a bit different, and I used silver leafing pen, instead of gold.

The last two cards pictured above, backgrounds were stamped with a blue Brilliance ink pad. Don’t remember the name of this gorgeous set, but it’s no longer available. It’s one of my favorite SU Christmas sets, and was surprised and sad to see it go. I think it’s a beautiful set. I just stamped the image three times, for the deer scene, overlapping a bit. Stamped the snowman and deer side by side for the other card background. The saying is in the same set. The little pinecone border at the top was a small, probably about 1″ diameter stamp. I just stamped it over and over to get the border at the top. Used the classic brown SU inkpad, to stamp the saying, and distress the card edges. Did I mention how much I LOVE the classic brown pad! I kept borrowing it from my friend, and finally realized how versatile it was, and how much I actually used it, and had to have one of my own. Since I do, I use it all the time, it’s wonderful for distressing the edges of your cards, or images. (One of my favorite techniques.)
My REAL Craft Room
Ok, I was going to wait until I got it organized better before posting, but this is a busy time for me, so it might be a while. So I thought I’d better get some pics up on here and show everyone how my craft room is right now. Keep in mind it’s still a work in progress, and I have a long way to go yet. But it’s useable now, I should have taken a before picture, you would not believe it. Honestly to see what it used to look like, watch the show, “Hoarders”. I’m not kidding, you could not see the floor, and there were times it was hard to open the door.
What happened, you may ask? I got tired of not being able to use it. We’ve been in our house for about 4-5 years now, and the “craft” room was always mine. I claimed it before we even bought the place. I think the kicker was seeing all the pretty craft rooms on the Cricut message boards, and it made me mad that I had a nice room too, but could not use it. It took about 5 days of working for several hours straight, to get it as it is now. Take a look!

The above pic shows my Jetmax storage, right when you walk into the room. I got these on sale at Micheal’s for 50% off. I bought three the first day, then went back the next day and grabbed two more. The one that holds the 4 chipboard boxes with lids, I have ink pads in one, and punches in another of the top two. Need to label them, as I always forget which is which. The ink pad box is stuffed full. Punch box is halfway, as I store alot of them in my Fiskars bag. I have a Snapware container on top of them, holding 12″x12″ paper pads. That thing is heavy!

Above is my desk, where I do alot of my work. You can see that it’s being used alot. I bought the 3 tier shelves at Target, clearanced out for $7 apiece. I have two on each side. This makes for deep shelf storage space, and they fit the top perfectly! I already had the tabletop, it was a shelf unit I got at Menards, when I bought the shelves for the room. It was bigger, and going to serve as a tabletop, but was trying to figure out how to get legs underneath it, until I talked to the ladies on the MB, and realized I just needed some cubes, or similar, DUH! It worked out great! I keep my SU markers handy in the bottom RH shelf, and scrap newspaper in the next one up. (I use it alot for counter protection.) I keep a small basket with most used items, on the RH side of desk, like bone folder, Cricut spatula, glue pens, and such items. The basket on the other side was given to me by a man at work that was going to have a yard sale. I just washed the liner. I keep other items in there that may not be used as much, but still handy to get at. Misc. markers, stylus, waterbrushes, and other such items. The strange looking wooden item beside this basket, I found at an auction. I think it may have been a shop project gone wrong. It would have been nice, but the corners don’t line up right. It’s very crooked. I just have it set so you can’t tell. The tabletop OttLite I have had for a long time, and not used very often. It is NICE, as I don’t have very good lighting in the room. I want to get some pegboard for the wall over the desk, too. I will paint it white, and have a box full of the hangers, both long and short, in our garage, or shed.

Above shows my Embellishment center. These were on sale at Archiver’s, for $39.99. I’ve never seen them for less than $70 retail. So I went to Archiver’s and (as always), was too late, they were sold out. BUT the lady was wonderful, and called different stores until she found me one. Had to pay for shipping, but still got it for about $50, great price! (I’m very cheap, and would not have ever paid full price for one!) The drawers were also 50% off, at the time, so I got two sets of two. I plan to keep all my reinkers here, and little bottles of paints and inks and stuff. It’s far from set up the way I want it. Haven’t found everything to put in there yet.
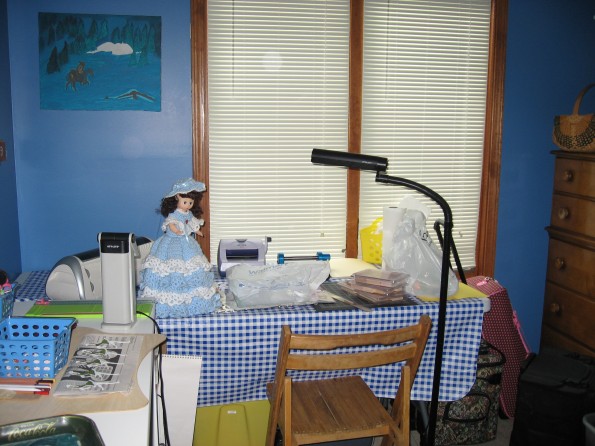
Above is not a very good picture, but the only one so far I have of my long table. The tablecloth protects it, and helps to hide the storage underneath. I have a couple totes, a Fiskars rolling tote, and a Stamp Store tote on wheels. Also a big bag of yarn for a couple of knitted afghans. The table is an 8′ plastic banquet table, on sale at Menard’s. Think I paid about $45 for it, but don’t remember for sure. It is one of the tables that I was using in my temporary craft space in the garage. I keep the Cricut Expression at the one end, in the corner, so it has enough room to run. Then I have a magnetic cutting mat with steel ruler, beside it. Behind this is my 5″ Xyron, then the “Wizard” die cut and embossing machine. (Who needs a cuttlebug! This is the same company that made Nestabilities.) I keep my heat gun on the other end, and wish I could find my wooden holder for it. Also at this end is my Ott floor lamp. I keep both of these on, and no matter where I’m working, I have great light! As you can see, the windows are behind the table, and hope to craft during daylight soon, so I can try them out. (My husband calls me a vampire, because I stay up all night, and sleep all day.) The canvas on the wall in the background is an unfinished “Bob Ross”, that I hope to finish, someday. The trees need alot of work. The doll is a doorstop that my brother’s girlfriend made for me a while back. I normally have her at the door, but had to move her, for some reason.

Ok now we’re getting into the messy, messy. Told you I still had a ways to go! You can see my nice dresser in the corner. I just have things stashed in there right now, in no particular order. Hope to sort soon. Then you can see the shelves that I put up, (not my husband). I made sure I found the studs, so that affected the placement somewhat. I plan to put my Stampin’ Up sets in order on these, after I find them. I know I have a tote full somewhere, and who knows how many others. The ones on there now, are ones my dad got for me in a yard sale. The rest I haven’t figured out yet, and stuff is random for now. Unfortunately you cannot see my nice oak rubber stamp cabinet, in the bottom RH corner of this pic. Which I guess is ok, anyway, since I never figured out how to put the doors on it. They have been setting beside it, since I got it all put together. The drawers are the acrylic picture frames. It is a “Collectors Cabinet”, bottom unit. It would be very nice, with the doors on. You can see the totes I still have to sort through, and find a spot for the stuff in them. It’s a wall in itself, since my room is so tiny. Ok, brace yourself for the last photo! It shows the messy closet.

The funny thing is that the closet wasn’t that bad until I started getting things organized in the rest of the room. Now it’s a complete mess! But hopefully will get better, when I do get things organized more. I plan to put things I don’t use as much on the top shelf in there, as it’s very high. Then I want to hang things on the rack, too. Probably will store the rest in here in totes, stacked on the floor. Overall, I will keep papercrafting stuff in the room, and other crafts in the closet, as I don’t use them as much.


Recent Comments